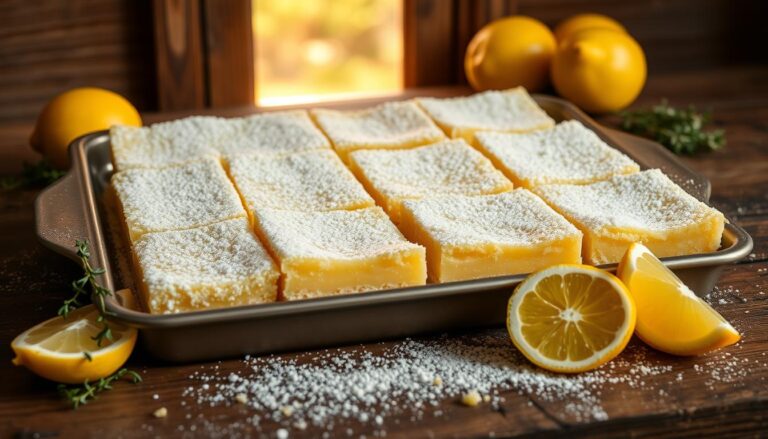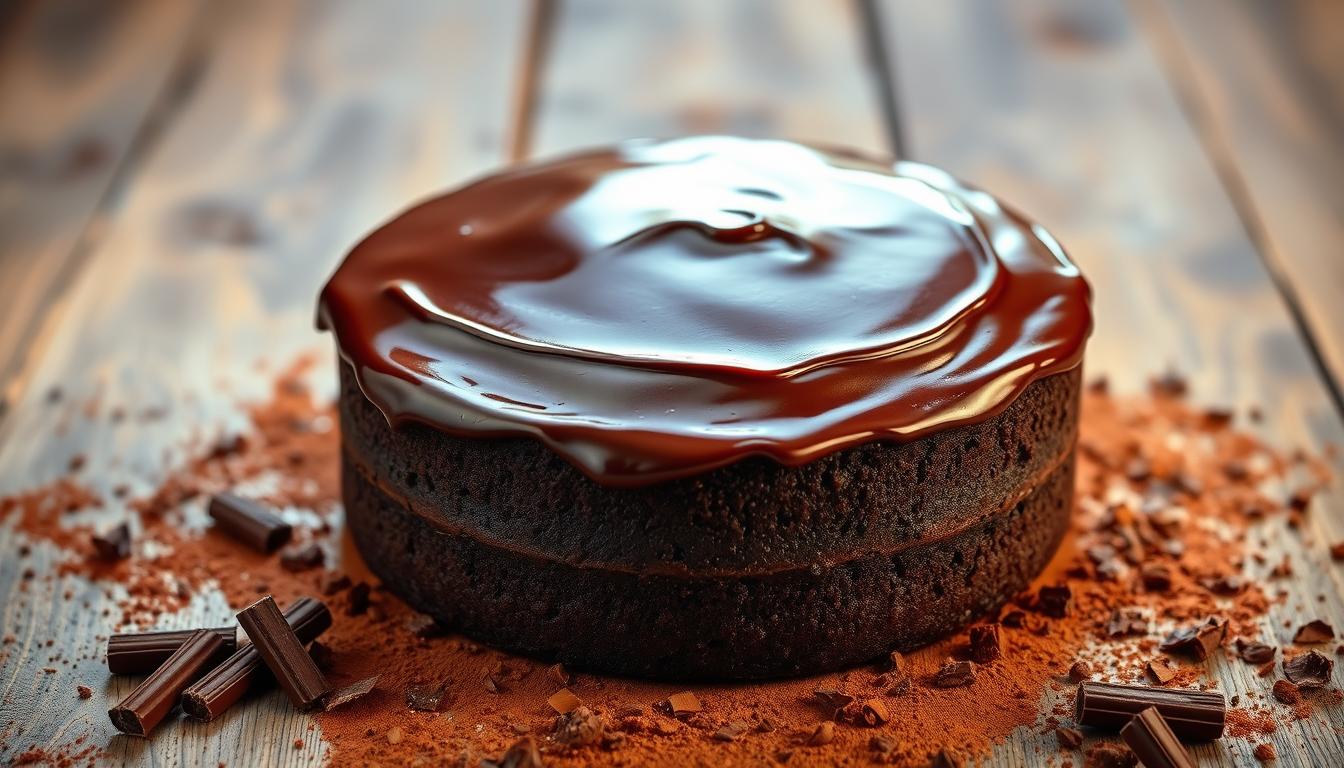
Are you ready to indulge in the richest, most decadent chocolate cake you’ve ever tasted? Look no further! This ultimate guide will walk you through the 7 secrets to creating a truly exceptional dessert from scratch.
This isn’t just any cake; it’s a masterpiece that stands out from the rest with its unparalleled moisture, depth of flavor, and velvety texture. After numerous iterations and perfection, this recipe is now foolproof, allowing even beginners to achieve professional-quality results.
By the end of this guide, you’ll have mastered the art of selecting the finest ingredients, employing expert mixing techniques, and applying invaluable baking tips to create the best chocolate cake imaginable.
Table of Contents
The Quest for the Perfect Chocolate Cake
The pursuit of the perfect chocolate cake is a journey many bakers embark on, but few achieve. As you strive to create a cake that’s both decadent and delightful, understanding the intricacies of chocolate and cake baking is essential.
Why Most Homemade Chocolate Cakes Fall Short
Many homemade chocolate cakes fail to impress due to common pitfalls such as overmixing, incorrect measurements, and wrong ingredient temperatures. These mistakes can lead to a dry, flavorless, or dense cake. Moreover, many recipes miss crucial steps that affect the final texture and flavor of the chocolate cake.
What Makes a Truly Exceptional Chocolate Cake
A truly exceptional chocolate cake is a result of a delicate balance between moisture, flavor development, and proper leavening. The science behind a great cake recipe involves understanding how to achieve this balance. Techniques such as “chocolate amplification” can enhance the chocolate flavor beyond just adding more chocolate. By testing dozens of cake recipes, we’ve identified key success factors that make a best chocolate cake stand out.
Essential Ingredients for a Decadent Chocolate Cake
To achieve a truly exceptional chocolate cake, it’s crucial to start with the right ingredients. The quality and type of ingredients used can significantly impact the final product’s taste, texture, and overall appeal.
The Role of Cocoa Powder: Natural vs. Dutch-Process
The type of cocoa powder used is fundamental to the cake’s flavor profile. For this chocolate cake recipe, it’s recommended to use natural cocoa powder rather than Dutch-process. Natural cocoa powder provides a more acidic and fruity flavor, which is ideal for this particular recipe. Dutch-process cocoa, on the other hand, is treated with an alkalizing agent to neutralize its acidity, resulting in a milder flavor. Since there’s no leavening occurring in the frosting, you can use either type in the chocolate buttercream.
Liquid Ingredients: Oil vs. Butter
When it comes to liquid ingredients, choosing between oil and butter is crucial. For this cake, it’s advised not to use butter in the batter. Cocoa powder is a drying ingredient, and using oil helps maintain the cake’s moisture. Oil absorbs less moisture from other ingredients, resulting in a moister cake. In contrast, butter can make the cake denser and drier due to its water content and the way it interacts with cocoa powder.
Sweeteners and Flavor Enhancers
The choice of sweeteners and flavor enhancers can significantly impact the cake’s overall taste and texture. Sugar not only adds sweetness but also affects the cake’s moisture retention and structure. Additionally, ingredients like vanilla and espresso powder can enhance the chocolate flavor without overpowering it. Using high-quality flour is also essential for achieving the right structure without toughness.
- Using unsweetened cocoa powder ensures a deep, rich chocolate flavor.
- Oil helps keep the cake moist by reducing the absorption of moisture from other ingredients.
- High-quality ingredients are crucial for the best flavor outcome.
- Sweeteners like sugar affect not just sweetness but also texture and moisture retention.
- Flavor enhancers such as vanilla and espresso powder amplify the chocolate flavor.
- Selecting the right flour is vital for proper structure without toughness.
The balance of these ingredients creates the foundation for an exceptional chocolate cake. By understanding the role of each ingredient, you can ensure that your cake turns out rich, moist, and full of flavor.
Secret #1: The Magic of Espresso Powder
Espresso powder is the magic ingredient that transforms an ordinary chocolate cake into an extraordinary one. One of the ingredients that really made this cake recipe come to life, in my opinion, was the addition of espresso powder in both the chocolate cake and in the chocolate frosting.
If you’ve not tried a bit of espresso when baking with chocolate, you really should. The espresso powder works to elevate the flavors in much the same way as vanilla extract and I now think of it as an essential part of my spice cabinet.
How Coffee Enhances Chocolate Flavor Without Adding Coffee Taste
The coffee compounds in espresso powder enhance the natural flavor notes of chocolate without imparting a coffee taste. This synergy between coffee and chocolate is well-known and utilized by professional bakers to create depth in chocolate desserts.
Proper Measurement and Substitution Options
To achieve the perfect flavor enhancement, use 1-2 teaspoons of espresso powder per cake recipe. If you don’t have espresso powder, you can substitute it with instant coffee or brewed coffee. For those who prefer a more precise measurement, here’s a simple guide:
| Ingredient | Measurement | Substitution |
|---|---|---|
| Espresso Powder | 1-2 teaspoons | Instant Coffee or Brewed Coffee |
| Cocoa Powder | 1 cup | Natural or Dutch-process |
By incorporating espresso powder into your recipe, you’ll notice a significant improvement in the overall flavor and depth of your chocolate cake. This simple ingredient can elevate your baking to the next level.
Secret #2: The Perfect Moisture Balance
A perfectly balanced moisture level is the backbone of any great chocolate cake recipe. You might be wondering what makes a cake moist and how to achieve that perfect balance without ending up with a soggy or dry cake.
Using Buttermilk and Sour Cream for Ultimate Moisture
The combination of buttermilk and sour cream is a game-changer when it comes to maintaining moisture in your cake. Buttermilk adds a tangy flavor and tenderness, while sour cream contributes to a rich, moist texture. The acidity in both ingredients reacts with leavening agents to produce a tender crumb.
To achieve the perfect moisture foundation, you can use a mix of buttermilk and sour cream. For instance, using 1 cup of buttermilk and 1/2 cup of sour cream can create a beautifully moist chocolate cake.
The Hot Liquid Technique for Blooming Cocoa
The “blooming” technique involves adding hot liquid (coffee or water) to cocoa powder to intensify the flavor. This process enhances the overall taste and aroma of your chocolate cake. When you add boiling water to the cocoa mixture, the batter will seem unusually thin, but this results in the most tender crumb.
| Ingredient | Ratio | Purpose |
|---|---|---|
| Buttermilk | 1 cup | Moisture and tenderness |
| Sour Cream | 1/2 cup | Richness and moisture |
| Hot Liquid | 1 cup | Blooming cocoa and intensifying flavor |
For those who need dairy-free options, you can substitute buttermilk with almond milk or soy milk mixed with vinegar or lemon juice, and use a dairy-free sour cream alternative. This way, you can maintain the moisture balance in your cake without compromising on taste or texture.

Secret #3: Mixing Methods That Make a Difference
Achieving the perfect chocolate cake requires more than just the right ingredients; it also demands the correct mixing technique. The way you combine your ingredients can significantly affect the final texture and taste of your cake.
The One-Bowl Method for Velvety Texture
The one-bowl method is a simple yet effective technique for achieving a velvety texture in your chocolate cake. To start, whisk together your dry ingredients in one bowl and your wet ingredients in another. Then, pour the wet ingredients into the dry ingredients, add the hot coffee, and whisk everything together until just combined. This method ensures that your cake batter remains smooth and free of lumps.
Avoiding Overmixing: Signs and Solutions
Overmixing is a common mistake that can lead to a dense, tough cake. To avoid this, mix your ingredients just until they come together in a smooth, yet still slightly lumpy, batter. Stop mixing as soon as you notice that the dry ingredients are fully incorporated. Using a whisk for wet ingredients and a spatula for folding can help prevent overdevelopment of the gluten in your cake.
| Mixing Technique | Effect on Cake |
|---|---|
| Overmixing | Dense, tough texture |
| Just Combined | Tender, velvety texture |
By adopting the one-bowl method and being mindful of overmixing, you can achieve a tender and delicious chocolate cake with a velvety texture.
Secret #4: Temperature Control for Baking Success
Achieving the perfect chocolate cake requires more than just a great recipe; it demands precision in every aspect of the baking process, starting with temperature control. The temperature of your ingredients and the precision of your oven’s temperature are crucial factors that can make or break your cake.
Room Temperature Ingredients: Why They Matter
Using room temperature ingredients is vital for creating a uniform batter. Eggs and butter at room temperature mix more smoothly, ensuring that your cake batter is consistent throughout. This consistency is key to a tender crumb and even baking. To quickly bring cold ingredients to room temperature, you can submerge eggs in warm water for a few minutes or leave butter out for about 30 minutes before baking.
- Egg and dairy products at room temperature blend more easily, creating a smoother batter.
- Cold ingredients can lead to a dense or uneven cake texture.
Oven Precision and Timing Techniques
Preheating your oven to the correct temperature is essential. An oven that’s off by even a few degrees can affect your cake’s texture and baking time. To ensure your oven is at the right temperature, consider using an oven thermometer. Timing is also crucial; while recipes provide guidelines, it’s essential to check for doneness using methods like the toothpick test or the spring-back test.
- Use an oven thermometer to verify your oven’s temperature accuracy.
- Check for doneness using multiple methods to ensure your cake is perfectly baked.

The Ultimate Chocolate Cake Recipe
Now that we’ve explored the secrets to a perfect chocolate cake, it’s time to put them into practice with our ultimate recipe. This recipe incorporates all the elements we’ve discussed, from the importance of quality ingredients to the techniques that ensure a moist and delicious cake.
Ingredients List
To make this decadent chocolate cake, you’ll need the following ingredients, measured precisely for the best results:
- 2 cups (240 g) all-purpose flour
- 2 cups (396 g) sugar
- 3/4 cup (63 g) unsweetened cocoa powder
- 2 teaspoons (8 g) baking powder
- 1 1/2 teaspoons (9 g) baking soda
- 1 teaspoon (2.8 g) kosher salt
- 1 teaspoon (2.3 g) espresso powder (homemade or store-bought)
- 1 cup (227 g) milk (or buttermilk, almond, or coconut milk as alternatives)
- 1/2 cup (99 g) vegetable oil (or canola oil, or melted coconut oil)
- 2 large (100 g) eggs
- 2 teaspoons (9.4 g) vanilla extract
- 1 cup (227 g) boiling water
Having all your ingredients measured and ready is crucial for a smooth baking process. Notice the use of both volume and weight measurements to cater to different preferences.
Step-by-Step Preparation Instructions
Follow these steps carefully to create your ultimate chocolate cake:
- Preheat your oven to 350°F (175°C). Prepare two 9-inch round baking pans by greasing them and lining the bottoms with parchment paper.
- In a large mixing bowl, combine the dry ingredients (flour, sugar, cocoa powder, baking powder, baking soda, and salt). Whisk them together until they’re well incorporated.
- In another bowl, whisk together the milk, oil, eggs, and vanilla extract.
- Add the wet ingredients to the dry ingredients and mix until just combined.
- Carefully pour in the boiling water and mix until the batter is smooth. The batter will be thin, but this is expected.
- Divide the batter evenly between the prepared pans. To ensure even layers, you can use a kitchen scale to measure the batter in each pan.
- Bake for 30-35 minutes or until a toothpick inserted into the center comes out clean.
- Let the cakes cool in the pans for 10 minutes before transferring them to a wire rack to cool completely.
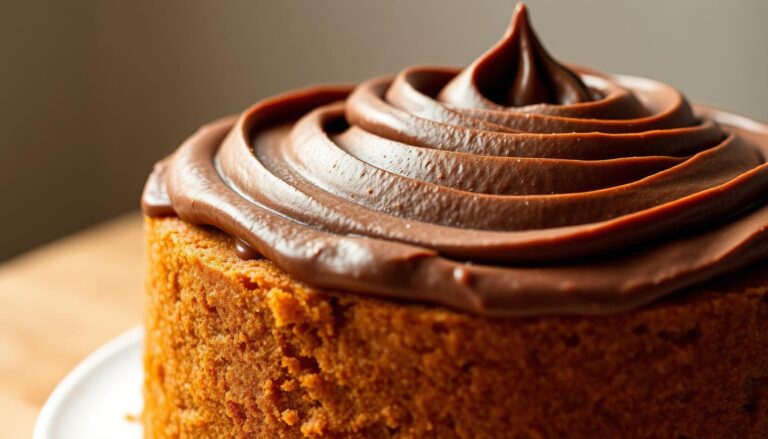
Chocolate Buttercream Frosting Recipe
To complement your cake, here’s a simple yet rich chocolate buttercream frosting recipe:
- 1 cup (200g) unsalted butter, softened
- 2 cups (400g) confectioners’ sugar
- 1/2 cup (63g) unsweetened cocoa powder
- 2 tablespoons milk or heavy cream
- 1 teaspoon vanilla extract
Beat the butter until creamy, then gradually add the confectioners’ sugar, cocoa powder, and vanilla extract. Adjust the consistency with milk or heavy cream until you achieve a smooth, spreadable frosting.
For a perfectly smooth frosting finish, make sure your cake is completely cooled, and use an offset spatula to spread the frosting evenly. You can also chill the cake in the refrigerator for about 10 minutes before frosting to help the frosting set faster.
Secret #5: Proper Cooling and Frosting Techniques
To elevate your chocolate cake from good to great, mastering the techniques of proper cooling and frosting is essential. This step is crucial for achieving a cake that not only tastes amazing but also looks professional.
The Patience Test: Cooling Times That Can’t Be Rushed
Proper cooling is non-negotiable for a perfect chocolate cake. It allows the cake to set its structure and distribute moisture evenly. Remove your cake from the oven and let it cool in the pan for about 10 minutes. Then, transfer it to a wire rack to cool completely. This patience will pay off in the final result.
Crumb Coating for Professional-Looking Results
A crumb coating is a thin layer of frosting applied to the cake before the final layer. It helps to trap any stray crumbs, ensuring a smooth finish. To crumb coat, apply a thin layer of buttercream to the cooled cake and refrigerate until firm, about 30 minutes.
Assembling and frosting a layer cake can be intimidating, but with the right technique, you can achieve a flawless finish. Start by placing a small spoonful of buttercream on your serving plate or cake round, then place the first cake layer on top. Spread a heaping cup of frosting evenly over the cake, followed by the second layer. Finish with a thin layer of frosting on top and sides, and refrigerate until firm.
| Frosting Technique | Description | Tips |
|---|---|---|
| Crumb Coating | Thin layer of frosting to trap crumbs | Refrigerate until firm |
| Final Frosting | Generous layer of frosting for final coat | Use an offset spatula for smooth sides |
| Layer Assembly | Assembling cake layers with frosting | Press gently to avoid breaking layers |
Secret #6: Customization Options That Work
The versatility of a chocolate cake recipe is one of its greatest strengths. You can easily adapt it to suit various dietary needs and preferences, or get creative with different flavors.
Dietary Adaptations: Gluten-Free, Dairy-Free, and Egg-Free Versions
To make a gluten-free chocolate cake, simply replace the all-purpose flour with an equal amount of gluten-free flour. For a dairy-free chocolate cake, you can use almond milk or coconut milk instead of regular milk. If you need an egg-free chocolate cake, try using 2/3 cup of unsweetened applesauce as a replacement for 2 large eggs.
| Dietary Need | Substitution |
|---|---|
| Gluten-Free | Gluten-free flour |
| Dairy-Free | Almond milk or coconut milk |
| Egg-Free | 2/3 cup unsweetened applesauce |
Flavor Variations That Complement Chocolate
Experiment with different flavors to complement your chocolate cake. Try adding raspberry or orange zest to give it a fruity twist. For a refreshing twist, add some mint extract. If you’re a coffee lover, you can intensify the chocolate flavor with a shot of espresso.
When incorporating different flavors, be mindful of the overall balance and texture of the cake. You can also scale your cake recipe to make cupcakes, sheet cakes, or bundt cakes, adjusting the baking time accordingly.
Secret #7: Storage Secrets for Maximum Freshness
Maintaining the freshness of your chocolate cake requires careful consideration of storage options. Proper storage ensures that your cake remains moist and flavorful for as long as possible.
Room Temperature vs. Refrigeration
When it comes to storing your chocolate cake, the debate between room temperature and refrigeration is ongoing. Storing your cake at room temperature is ideal for maintaining moisture, as refrigeration can dry out the cake. However, if you live in a hot climate, refrigeration might be necessary to prevent the frosting from melting. Use a cake dome to keep your cake fresh at room temperature.
| Storage Method | Advantages | Disadvantages |
|---|---|---|
| Room Temperature | Maintains moisture, easy access | Frosting may melt in hot climates |
| Refrigeration | Prevents frosting from melting | Can dry out the cake |
Freezing Tips for Make-Ahead Convenience
Freezing your cake layers is a great way to prepare ahead for special occasions. To freeze, wrap your cooled cake layers tightly in plastic wrap and place them in a gallon zip-top freezer bag. You can freeze the cake layers for up to one month. When you’re ready to frost, thaw the layers in the refrigerator with the wrapping intact, then frost once thawed. This method ensures your cake stays fresh and your frosting doesn’t melt.
Conclusion: Your Path to Chocolate Cake Perfection
With the seven secrets revealed, you’re now equipped to transform your ordinary chocolate cake into an extraordinary dessert. Mastering these techniques will elevate not just your chocolate cake recipe, but all your baking endeavors. Feel free to experiment with the recipe while respecting the core principles. The joy of sharing a perfectly executed chocolate cake is unmatched. We invite you to share your results and adaptations. Remember, baking is both science and art – precision matters, but so does personal touch. Start baking your best chocolate cake ever!