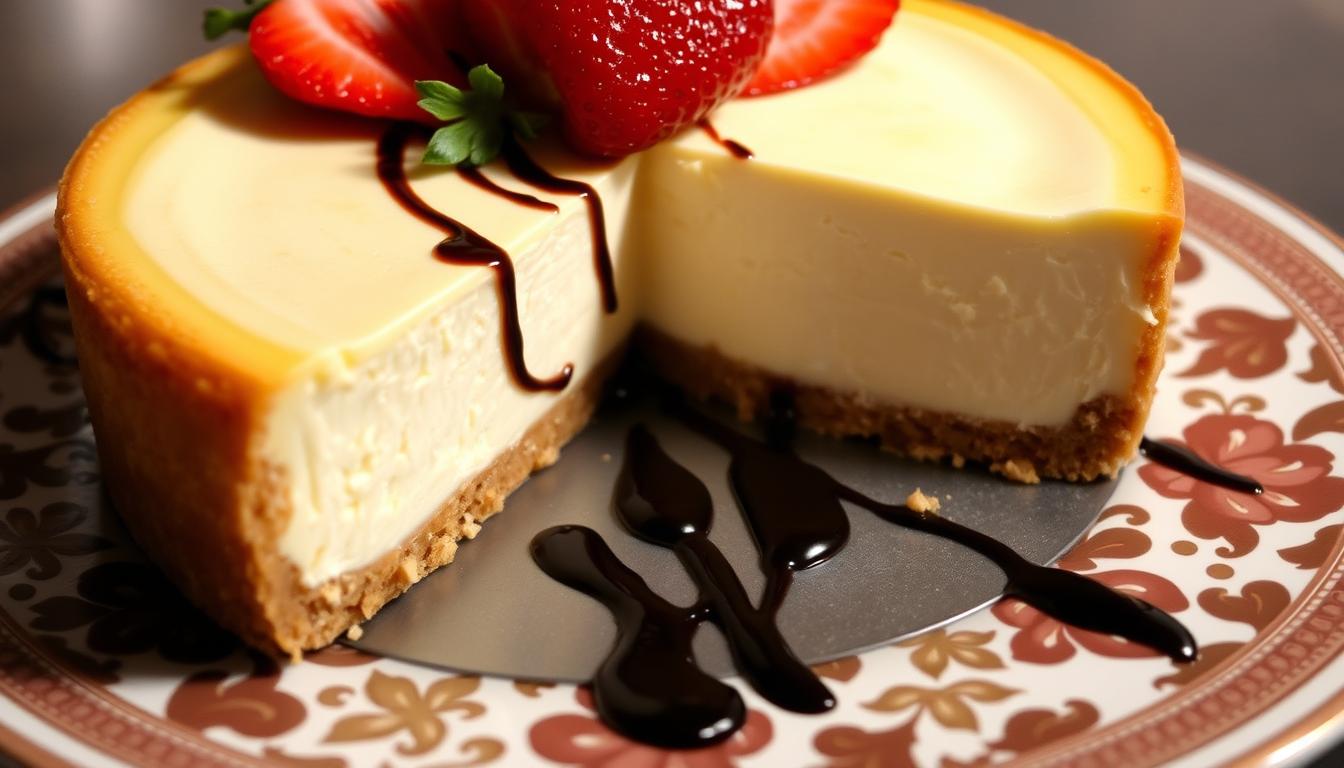
Making a perfect cheesecake can be a daunting task, especially for those new to baking. Issues like cracked tops, soggy crusts, or dense textures can be frustrating.
To make cheesecake like a pro, it’s essential to understand the common pitfalls. This guide will walk you through the top 5 mistakes people make when preparing a cheesecake recipe and provide practical solutions to achieve a creamy, smooth dessert.
By mastering the techniques involved and understanding the role of ingredients like cream cheese, you’ll be well on your way to creating a delicious cheesecake that will impress your family and friends.
Table of Contents
The Art of Perfect Cheesecake
A perfect cheesecake is the result of a delicate balance between ingredients and technique. Making a cheesecake can be intimidating, but understanding its core elements can simplify the process.
Why Cheesecakes Can Be Intimidating
Cheesecakes are often considered challenging to make because they require precision in both ingredients and technique. The intimidation factor comes from stories of cracked tops, sunken centers, and water bath leaks. However, by recognizing that a cheesecake is essentially a baked custard, you can better understand the need for gentle heat and careful temperature control.
What Makes a Great Cheesecake
A great cheesecake balances several key elements: a crisp, flavorful graham cracker crust, a silky-smooth filling with the perfect balance of sweetness and tanginess, and a crack-free surface. The New York style cheesecake, known for its dense and rich texture, is a gold standard for many bakers. Professional bakers know that patience is crucial, from allowing ingredients to come to room temperature to the slow cooling process. For a foolproof New York cheesecake recipe, check out this guide from Serious Eats that covers all the steps to achieving the perfect texture and flavor. A classic cheesecake relies on simple flavors that highlight the cream cheese, but variations exist to suit any taste.
| Key Element | Description | Importance |
|---|---|---|
| Graham Cracker Crust | Crisp and flavorful base | High |
| Cream Cheese Filling | Silky-smooth with balanced sweetness and tanginess | High |
| Baking in a Water Bath | Gentle heat to prevent cracking | High |
Mistake #1: Ignoring the Water Bath
One of the most critical mistakes you can make when baking a cheesecake is ignoring the water bath. Your oven is a very dry environment, which can cause the cheesecake to dry out or form cracks. To achieve a perfectly creamy and velvety cheesecake texture, it’s crucial to control the rate of cooking.
Why Water Baths Matter
A water bath, also known as a bain-marie, is essential for creating a humid environment that helps your cheesecake bake evenly. It prevents the surface from drying out and cracking. The water bath regulates the temperature, ensuring that the heat reaching your cheesecake is gentle and consistent. This is crucial for achieving that perfectly creamy texture.
- A water bath helps to prevent cracking and promotes even baking.
- It serves as a temperature regulator, ensuring gentle heat.
- The difference between a cheesecake baked with and without a water bath is noticeable in both texture and appearance.
How to Set Up a Proper Water Bath
To set up a proper water bath, you’ll need to wrap your springform pan thoroughly with heavy-duty aluminum foil to prevent water from seeping into the crust. The water should reach about halfway up the sides of your pan, providing enough moisture without risking overflow. If you’re concerned about leaks, consider using alternatives to aluminum foil, such as oven-safe bags or silicone wraps designed for springform pans.
By following these steps, you’ll be able to achieve a silky-smooth cheesecake that cooks evenly from edge to center and maintains a beautiful, crack-free surface.
Mistake #2: Cold Ingredients and Overmixing
To ensure your cheesecake turns out creamy and smooth, it’s crucial to avoid using cold ingredients and overmixing the batter. These two mistakes can lead to a cheesecake that’s lumpy, uneven, or even cracked.
The Importance of Room Temperature Ingredients
Using cold ingredients, particularly cream cheese, can result in a lumpy, uneven cheesecake batter. For best results, set your cream cheese, eggs, and sour cream out at least 2 hours before you plan to start baking to ensure they’ve properly warmed to room temperature. This simple step helps ingredients blend together more smoothly and trap less air, which is crucial for preventing cracks during baking and achieving that signature velvety texture.
Proper Mixing Techniques
To mix your cheesecake batter correctly, use an electric mixer fitted with a paddle attachment. Cut the cream cheese into chunks and place them in the bowl of the mixer. Mix on medium speed for 4 minutes until the mixture is smooth, soft, and creamy. When adding eggs, incorporate them one at a time on low speed, mixing just until each is incorporated before adding the next. Remember to scrape down the sides and bottom of the bowl frequently to ensure no pockets of unmixed cream cheese remain.
- Ensure all ingredients are at room temperature before mixing.
- Mix the batter on medium speed and avoid overmixing.
- Scrape down the sides and bottom of the bowl frequently.
Mistake #3: Improper Pan Preparation
Improper pan preparation can lead to a cheesecake disaster, particularly when using a water bath. The springform pan, while ideal for easy cheesecake removal, is prone to leaking when submerged in water.

Preventing Water Bath Leaks
To prevent water from seeping into your cheesecake, it’s crucial to wrap your pan correctly. Start by placing a large square of heavy-duty aluminum foil on a flat surface. Position the springform pan in the center and gently fold the sides of the foil around it, ensuring there are no holes. Press the foil against the bottom and sides of the pan. Repeat this process with at least two more layers of foil for extra protection against water leaks.
Alternative Methods to Foil Wrapping
If you’re looking for alternatives to traditional foil wrapping, consider using oven-safe silicone wraps designed for springform pans. Another option is to place your pan inside a slightly larger regular cake pan before putting it in the water bath. Some bakers also use slow cooker liners or oven bags around the pan for added protection. These methods can help safeguard your graham cracker crust from becoming soggy due to water exposure.
Mistake #4: Overbaking and Improper Cooling
One of the most critical steps in making a cheesecake is avoiding overbaking and improper cooling. Overbaking is perhaps the most common mistake that leads to dry, cracked cheesecakes with a less-than-ideal texture. Unlike most baked goods, a cheesecake should not be completely set when you remove it from the oven—the center should still have a slight jiggle, similar to set gelatin.
How to Tell When Your Cheesecake Is Done
Determining doneness can be tricky, but there are a few key signs to look for. The outer ring of your cheesecake should look slightly puffed and set, but the inner circle should still jiggle just a little bit. You can also use an instant-read thermometer to check for doneness; a perfect cheesecake should register between 150°F and 155°F in the center.
| Signs of Doneness | Description |
|---|---|
| Outer Ring | Slightly puffed and set |
| Inner Circle | Still jiggles slightly |
| Internal Temperature | Between 150°F and 155°F |
The Slow Cooling Method
Rapid temperature changes are the enemy of crack-free cheesecakes, which is why the cooling process is just as important as the baking process. The proper cooling method involves turning off the oven, cracking the door open slightly, and allowing the cheesecake to gradually cool in the residual heat for about an hour. After the initial cooling in the oven, the cheesecake should continue cooling at room temperature before being transferred to the refrigerator for final setting.
This three-stage cooling process might seem excessive, but it’s the secret professional bakers use to prevent dramatic temperature shifts that cause cracks and sinking. By following this method, you can ensure your cheesecake cools properly and maintains its integrity.
Mistake #5: Crust Problems
A common issue many home bakers face is a problematic crust, which can be either too soggy, too crumbly, or lacking in flavor. The crust is a fundamental component of a cheesecake, and its quality can make or break the dessert.
Creating the Perfect Graham Cracker Base
To create a perfect graham cracker crust, start by pulsing graham crackers in a food processor until finely ground. Mix the crumbs with sugar and salt, then stir in melted butter until well combined. Press the mixture into a 9×2 3/4-inch round springform pan, ensuring an even layer at the bottom. Bake at 350°F (175°C) for 10 minutes to set the crust.
The ratio of graham cracker crumbs to butter is crucial. Too little butter, and the crust will crumble; too much, and it becomes greasy. Proper compression of the crumb mixture is also essential, using a flat-bottomed measuring cup or glass to firmly press the crumbs into an even layer.

Preventing a Soggy or Crumbly Crust
Pre-baking the crust is a critical step that many recipes overlook. This 10-minute bake helps set the butter and creates a barrier against moisture from the filling. To further prevent sogginess, consider brushing the baked crust with a thin layer of egg white and returning it to the oven for 3 minutes.
| Crust Issue | Solution |
|---|---|
| Soggy Crust | Pre-bake crust, brush with egg white |
| Crumbly Crust | Adjust graham cracker to butter ratio, proper compression |
| Lack of Flavor | Add pinch of salt or cinnamon to graham cracker crumbs |
Classic Cheesecake Recipe

With the common pitfalls out of the way, let’s dive into a tried-and-true classic cheesecake recipe that incorporates all the techniques we’ve discussed. This recipe is designed to help you create a perfect dessert every time, with a creamy texture and a delicious graham cracker crust.
Ingredients You’ll Need
To make this classic cheesecake, you’ll need the following ingredients for the crust and the filling. For the crust, you’ll need 1½ cups of graham cracker crumbs (from 12 whole crackers), 5 tablespoons of unsalted butter (melted), 2 tablespoons of sugar, and ⅛ teaspoon of salt. For the filling, you’ll need 32 oz (four 8-oz blocks) of cream cheese at room temperature, 2 cups of sugar, 3 tablespoons of all-purpose flour, 4 teaspoons of vanilla extract, 1 teaspoon of packed lemon zest, 2 teaspoons of fresh lemon juice, ¼ teaspoon of salt, 6 large eggs, and ½ cup of sour cream.
Step-by-Step Instructions
Start by preheating your oven to 325°F (165°C). Prepare your 9- or 10-inch springform pan by wrapping it in 18-inch heavy-duty aluminum foil to prevent leaks. Mix the graham cracker crumbs, sugar, and melted butter to create the crust, pressing it into the prepared pan. Bake the crust for 10 minutes, then set it aside.
For the filling, beat the cream cheese until smooth, then gradually add the sugar and flour. Beat in the vanilla extract, lemon zest, lemon juice, and salt. Add the eggs one at a time, beating just until combined. Stir in the sour cream. Pour the filling into the prepared crust and smooth the top.
Bake the cheesecake for 55-60 minutes or until the edges are set and the center is just slightly jiggly. Remove it from the oven and let it cool slowly in the oven with the door ajar. Once cooled, refrigerate the cheesecake for at least 4 hours or overnight.
Troubleshooting Tips
Common issues with this recipe include lumpy batter (usually from cold ingredients), cracks (from overbaking or rapid temperature changes), and soggy crusts (from water bath leaks). To avoid these issues, ensure your ingredients are at room temperature, don’t overbake, and keep your water bath level below the top of the foil wrapping.
By following this classic cheesecake recipe and the techniques discussed in previous sections, you’ll be well on your way to creating a perfect cheesecake that’s sure to impress. Enjoy!
Serving and Storage Tips
Serving and storing your cheesecake correctly is just as important as baking it to perfection. A well-made cheesecake deserves to be served and stored properly to maintain its texture and flavor.
Perfect Slicing Techniques
To achieve clean, professional-looking slices, dip your knife in hot water and wipe it dry between each cut. This technique helps the knife glide through the dense cheesecake filling without dragging or creating messy edges. It’s also crucial to allow your cheesecake to chill completely in the refrigerator for at least 4 hours or overnight before slicing.
How to Store Your Cheesecake
When it comes to storing your cheesecake, keep it in the refrigerator, covered loosely with plastic wrap or placed in an airtight container, to prevent it from absorbing other food odors. You can prepare the cheesecake up to three days before serving. Consider adding a layer of sour cream topping just before serving to enhance flavor and hide any imperfections on the top surface. Properly stored cheesecake will maintain its quality for up to 5 days in the refrigerator.
Conclusion
With the knowledge gained from this comprehensive guide, you’re now poised to master the art of cheesecake baking. By avoiding common mistakes like ignoring the water bath and overmixing, you’ll dramatically improve your results. Remember, patience is key, from allowing ingredients to come to room temperature to the slow cooling process. Experiment with different flavors and presentations to create your signature cheesecake. Whether you’re making a classic recipe or trying a no-bake cheesecake, the possibilities are endless. With practice, you’ll be creating cheesecakes that rival those from professional bakeries.