Are you looking for a dessert that’s both delicious and easy to make? Look no further than the cheesecake that’s taking the world by storm – the no bake cheesecake. This cheesecake recipe is a game-changer, especially during warm weather when you don’t want to heat up your kitchen.
This easy no-bake treat requires only 7 simple steps to achieve a perfect dessert. Unlike traditional baked versions, this cheesecake has a lighter, creamier texture that’s sure to please even those who “don’t like cheesecake.” In this comprehensive guide, you’ll learn how to make a mouth-watering no bake cheesecake that’s perfect for any occasion.
Table of Contents
Why No-Bake Cheesecake Deserves a Spot in Your Dessert Rotation
When it comes to desserts, few treats are as beloved as cheesecake, and the no-bake version is a game-changer. No-bake cheesecake simplifies the traditional cheesecake-making process, eliminating the need to use an oven.
The Appeal of No-Bake vs. Traditional Cheesecake
No-bake cheesecake differs significantly from its traditional counterpart. It boasts a lighter, mousse-like texture and a clean, tangy flavor without the richness of eggy custard. The absence of eggs and baking reduces the risk of common cheesecake issues like cracking and over/under baking. This makes no-bake cheesecake an attractive option for those seeking a hassle-free dessert.
Perfect for Warm Weather and Busy Schedules
No-bake cheesecake is ideal for warm weather when you don’t want to heat up your kitchen with the oven. It’s also perfect for busy schedules, as it saves time and effort. With no-bake cheesecake, you can enjoy a delicious, easy no-bake cheesecake without the complexity of traditional cheesecake recipes. The cream cheese flavor shines through, making it a delightful dessert.
- Makes a great dessert for any occasion
- Eliminates the risk of cheesecake cracking and other baking issues
- Saves time and effort in the kitchen
Essential Ingredients for a Foolproof No Bake Cheesecake
To make a no-bake cheesecake that’s both creamy and stable, you’ll need to focus on the quality of your ingredients. The right combination of ingredients will ensure that your cheesecake sets properly and has a delicious flavor.
Graham Cracker Crust Components
The crust is a crucial component of your no-bake cheesecake, and it’s made with graham cracker crumbs, melted butter, and brown sugar. These ingredients work together to create a crunchy base that complements the creamy filling. To make the crust, you’ll need to crush graham crackers into fine crumbs and mix them with melted butter and brown sugar.
Cream Cheese Filling Ingredients
The filling is where the magic happens, and it’s all about the cream cheese. You’ll need to use high-quality, full-fat brick cream cheese that’s at room temperature. This ensures that the cheesecake has the right texture and flavor. Other essential ingredients include heavy cream, which is whipped to stiff peaks to give the cheesecake its structure, and granulated sugar, which adds sweetness without overpowering the other flavors.
Optional Flavor Variations and Add-ins
To give your no-bake cheesecake a personal touch, you can experiment with different flavor variations and add-ins. Consider adding a splash of vanilla extract or a squeeze of lemon juice to enhance the flavor profile. You can also add a dollop of sour cream to give the cheesecake a tangy twist.
Step 1: Preparing the Perfect Graham Cracker Crust
The first step in making a no-bake cheesecake is creating a graham cracker crust that’s not only delicious but also structurally sound. This crust serves as the foundation of your dessert, providing a crunchy contrast to the creamy cheesecake. To achieve this, you’ll need to focus on three key aspects: crushing the graham crackers, adding the right amount of butter and sugar, and pressing the mixture into the pan.
Crushing Graham Crackers to the Right Consistency
To begin, you’ll need to crush graham crackers into fine crumbs. The ideal texture is not too fine, which can make the crust dense, nor too chunky, which can cause it to crumble. You can achieve the perfect consistency by using a food processor or placing the crackers in a plastic bag and crushing them with a rolling pin. Aim for a texture that’s similar to coarse sand.
Adding Butter and Sugar for Structure
The next step involves mixing the graham cracker crumbs with melted butter and brown sugar. The melted butter acts as a binding agent, holding the crumbs together without the need for baking. Brown sugar is preferred over granulated sugar in this recipe because its moisture content helps solidify the crust, giving it the necessary structure.
Pressing the Crust for Maximum Stability
Once your crust mixture is ready, press it into a 9-inch springform pan. Use a flat-bottomed measuring cup or glass to compress the mixture evenly, ensuring maximum stability. It’s crucial to chill or freeze the crust while you prepare the filling to help it set properly. A well-packed crust not only prevents crumbling when slicing but also provides a solid base for your cheesecake.
- Crush graham crackers to achieve a texture similar to coarse sand.
- Mix crumbs with melted butter and brown sugar for a binding effect.
- Press the mixture into a springform pan using a flat-bottomed tool.
- Chill the crust to help it set before adding the filling.
Step 2: Creating a Silky-Smooth Cream Cheese Base
The foundation of a great no-bake cheesecake lies in its silky-smooth cream cheese base. To achieve this, you’ll need to focus on a few key steps that ensure your cheesecake turns out creamy and divine.
Bringing Cream Cheese to Room Temperature
First and foremost, it’s essential to bring your cream cheese to room temperature. Cold cheese will remain lumpy no matter how long you beat it, which can ruin the texture of your cheesecake. Allowing it to soften ensures that it will mix smoothly with other ingredients.
Incorporating Sugar and Flavorings
Using a hand mixer or a stand mixer fitted with a whisk or paddle attachment, beat the cream cheese and granulated sugar together on medium speed until perfectly smooth and creamy. Scrape down the sides and up the bottom of the bowl as needed. Add confectioners’ sugar, sour cream, lemon juice, and vanilla extract, and beat for 2-3 minutes on medium-high speed until smooth and combined.
Achieving the Perfect Consistency
Make sure there are no large lumps of cheese. If there are lumps, keep beating until smooth. The mixture should be completely smooth with no lumps before you move to the next step. You can enhance the flavor by incorporating vanilla extract and other desired flavorings without overwhelming the cheese flavor.

Step 3: Whipping Heavy Cream to Stiff Peaks
The process of whipping heavy cream is essential for giving your no-bake cheesecake the right texture. To achieve this, you’ll need to use a hand mixer or a stand mixer fitted with a whisk attachment.
The Secret to Proper Aeration
Cold heavy cream is crucial for proper whipping. If the cream is too warm, it won’t hold air properly, resulting in a cheesecake that’s more like soup than a solid dessert. To whip the cream correctly, pour it into a chilled bowl and beat it on medium-high speed using your mixer.
Whipping cream to stiff peaks requires some patience and the right technique. It typically takes around 4-5 minutes of whipping time to achieve the desired consistency. You’ll know the cream is ready when it stands up straight when the beaters are lifted and holds its shape firmly.
How to Know When Your Cream is Ready
To check if your cream has reached stiff peaks, stop the mixer and lift some of the cream with the beaters. If it forms a peak that doesn’t collapse, it’s ready. Be careful not to over-whip, as this can turn your cream into butter.
| Whipping Stage | Description | Result |
|---|---|---|
| Under-whipped | Cream is still quite liquid | Cheesecake soup |
| Properly Whipped | Cream stands up straight when beaters are lifted | Light, mousse-like cheesecake |
| Over-whipped | Cream turns into butter | Butter and buttermilk |
By whipping your heavy cream to stiff peaks, you’re incorporating air into the cheesecake filling, which is essential for its structure and texture. This step is what sets a no-bake cheesecake apart from a dense, soggy mess.
Steps 4-7: Combining, Setting, and Serving Your No Bake Cheesecake
As you near the completion of your no-bake cheesecake, you’ll need to combine the cheese mixture with whipped cream, transfer it to the crust, and let it set. This involves a few critical steps that require patience and attention to detail.
Folding Whipped Cream into the Cheese Mixture
To incorporate the whipped cream into the cheesecake filling, use your mixer on low speed or a silicone spatula to gently fold until combined. This process takes several turns and requires patience to avoid deflating the air in the whipped cream.
Transferring to the Prepared Crust
Remove the crust from the freezer and spread the cheesecake filling into it. Use an offset spatula to smooth down the top, creating a beautifully finished surface.

Refrigerating for Proper Setting
Cover the cheesecake tightly with plastic wrap or aluminum foil and refrigerate for at least 6-8 hours. For best results, refrigerate for 12 hours or overnight. This step is crucial for the cheesecake to set properly.
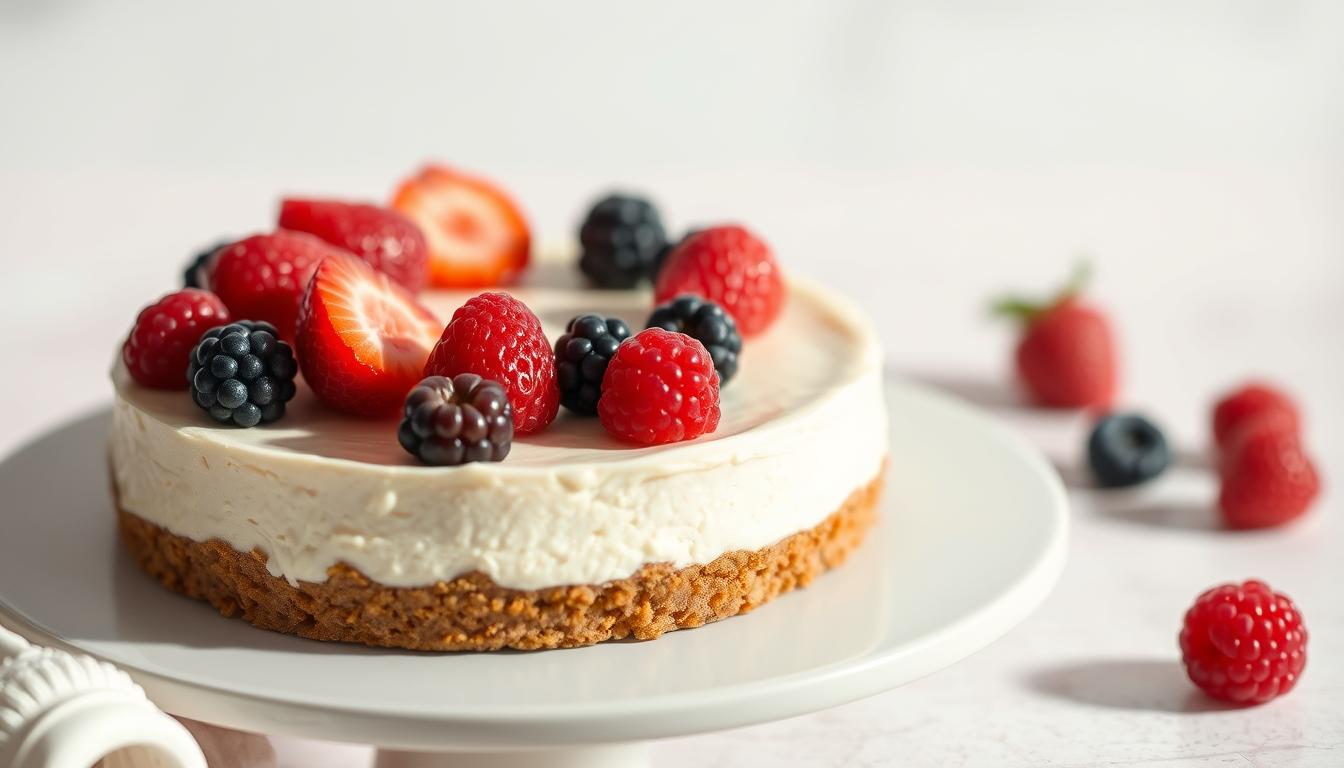
Decorating and Serving Your Masterpiece
Once set, remove the cheesecake from the springform pan and decorate with your choice of toppings, such as fresh fruit, whipped cream, or chocolate. Slice carefully and serve.
| Step | Description | Time Required |
|---|---|---|
| Step 4: Folding Whipped Cream | Gently combine whipped cream with cheesecake filling | Several minutes |
| Step 5: Transferring to Crust | Spread cheesecake filling into the prepared crust | 5 minutes |
| Step 6: Refrigerating | Refrigerate cheesecake to set | 6-8 hours or overnight |
| Step 7: Decorating and Serving | Decorate and serve the cheesecake | Variable |
By following these steps, you’ll have a beautifully set no-bake cheesecake that’s perfect for any occasion. This easy no-bake dessert is ideal for entertaining, as it improves with time in the refrigerator.
Troubleshooting Tips and Storage Recommendations
Troubleshooting your no-bake cheesecake can be straightforward with the right guidance. Even with a simple no-bake cheesecake recipe, issues can arise, but knowing how to address them can save your dessert.
Common Issues and How to Fix Them
Common problems with no-bake cheesecakes include a filling that won’t set, a crust that crumbles, or a lumpy texture. To fix a filling that won’t set, ensure your cream cheese is at room temperature before mixing, and that you’ve refrigerated it for a sufficient amount of time. For a crumbly crust, check that you’ve pressed it firmly into the pan. If your cheesecake is lumpy, you may not have mixed the filling thoroughly enough.
Make-Ahead and Freezing Instructions
No-bake cheesecakes are perfect for make-ahead entertaining. You can prepare the dessert days in advance and store it in the refrigerator for up to 5 days. For longer storage, you can freeze the cheesecake for up to 3 months. To do this, wrap the cheesecake in plastic wrap and then aluminum foil. When you’re ready to serve, thaw it in the refrigerator for about 8 hours. Remember, you should never freeze a no-bake cheesecake to speed up the setting process; it needs to be refrigerated to set properly.
Conclusion
The joy of no-bake cheesecake lies in its simplicity and the impressive results it yields. By following the 7 simple steps outlined in this article, you can create a delicious cheesecake that’s perfect for any occasion.
This easy no-bake recipe eliminates the hassle of traditional baking, making it ideal for warm weather and busy schedules. Whether you’re a novice baker or a seasoned pro, you’ll appreciate the foolproof nature of this no-bake cheesecake recipe.
Feel free to experiment with seasonal variations and topping ideas to make this cheesecake recipe your own. With its creamy texture and rich flavor, this dessert is sure to please even the most discerning cheesecake enthusiasts. Try it out, share your experiences, and don’t hesitate to ask questions about the recipe. This no-bake cheesecake is sure to become a go-to dessert for entertaining, and you can explore other cheesecake recipes once you’ve mastered this basic version.